Sunday, January 1, 2012
Pillow cases
I know the holidays are over, but I had left over Christmas fabric and I had to do something with it, so I made pillow cases. My in-laws love getting pillow cases every year, they love the fact that they have no raw edges showing, therefore no loose threads. They don't sew, so they are easily amazed at how talented I am (ha! ha!).
I'm constantly being asked how to make them, I thought of doing a tutorial, but by the time I thought about it I was well into my last pillow case. So lets just call this a kwiktorial!
Start out with body of the pillow case (standard pillow case: 26 1/2 x 41). I made mine a little longer, my pillows are queen size.
The border will be 10 x 41 (contrasting color).
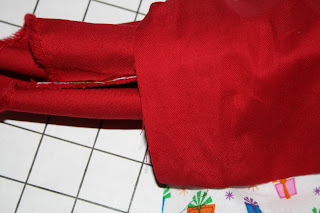
Lay the contrasting color (border) flat and right side up and lay the body of the pillow right side down on top of the border, roll the body up until you see the edge of the contrasting color, at this point you take the contrasting color and sandwich the body of the pillow case, pin and sew, so that it looks like this:
You will then start pulling out the body, like this:
Iron, border of pillow case, and add any embroidery you like or you can zig zag or not do anything at all if you like. I like to add different embroidery to mine.
Now we're ready to sew up the side, you will be sewing this right side out, it should look like this when you're done:
Cut as close as possible to the seam without cutting into it:
Now you want to iron the seam flat and turn inside out and sew along the edge being careful to sandwich the raw edges, this is called a french seam, its just makes things neater.
Now you repeat the above steps to finish the bottom, when finished it will look like this:
You're done!
Just one more and you've got a set!
Subscribe to:
Post Comments (Atom)


No comments:
Post a Comment