Saturday, January 28, 2012

Trouser jeans

When I entered the Jeans Contest on Pattern Review earlier this months, my intentions were to make my first pair of jeans, so I bought B5682.  But the more I looked at the pattern and read the instructions, the more intimidated  I got.  Back pockets and rivets really scare me.  So I decided to make trouser jeans instead, no back pockets and no rivets!  But the trouser jean pattern that came with B5682, just seemed to wide legged, lucky for me  I found a pair of pants I really liked on BurdaStyle, but after reading the reviews I decided the legs needed a little flair, so I combined BurdaStyle and B5682 and this is what I came up with.  I used a 10.5 weight denim, and some vintage buttons I had on hand.

I wanted to do something a little different for the waistband, I lined the inside with a pretty print  and I omitted the belt loops, I never wear a belt anyway.
I also lined the pockets and the flap with the same fabric.


The are actually very comfortable  to wear, and they look good! I can see making a couple more of these in different colors, in the very near future.


Saturday, January 14, 2012

Tote

I bought this pattern (B5267) a couple of years ago when I had given up on sewing clothes because I couldn't figure out my size. So when my daughter asked me to make her a tote, I had just the pattern for it.  I made view C and then I decided it didn't have enough pockets so  I added pockets from view C as well.  I used an upholstery fabric I had in my stash, but I didn't have anything for the lining, so I took the fabric and turned it inside out, I  didn't use interfacing because I figured the upholstery fabric was stiff enough that I wouldn't need it, also I thought it would be difficult turning it, if it was too stiff.  I don't know what I used for the pockets and handles, it was some remnant from another project.  It looks like some type of leather/suede synthetic material, anyway it worked.

                                                                    Front of tote

                           Yes I know, this pocket does look like its off a little,
                            I took it took it off three times, and this is the best I could
                           do, its the back of the tote, so no one will notice it, I hope!

                           Inside pocket, see how you can hardly tell this is one
                           wrong side of the fabric?


                             Just to give you an idea of how big this tote is, I put it
                             on my mannequin, it measure 15 x 13 x 5,  I thought it
                             was quite large, but she asked for a big one, I hope she
                             likes it.

Saturday, January 7, 2012

A-line skirt

After reading Handmade Jane's blog about her Apple Print Ginger  skirt, a few months ago, I been looking for a pattern for A line skirts, I just fell in love with her skirt, but I didn't have a pattern for one, ever since then I've been  looking for a decent pattern.   Well, I think I found one, although not the same pattern she had, it's definitely easy.  So easy, I whipped up 2 skirts in about 2 hours.  It's M3341 and I used corduroy fabric.  The first one I made turned out too big, I had to take it in quite a bit. This is the second one I made and I made it a size smaller, it fit perfectly.  I was a little disappointed in the back, because of the vertical lines, it makes my butt look wider than it actually is.  Lesson learned, if I ever make a plaid skirt I will need to get extra fabric to match the vertical lines.  All in all I was pretty pleased with the outcome, I think it looks pretty good.  I'll definitely be using this pattern again.


Sunday, January 1, 2012

Pillow cases


I know the holidays are over, but I had left over Christmas fabric and I had to do something with it, so I made pillow cases.  My in-laws love getting pillow cases every year, they love the fact that they have no raw edges showing, therefore no loose threads. They don't sew, so they are easily amazed at how talented I am (ha! ha!).
 I'm constantly being asked how to make them, I thought of doing a tutorial, but by the time I thought about it I was well into my last pillow case.  So lets just call this a kwiktorial!

Start out with body of the pillow case (standard pillow case: 26 1/2 x 41).  I made mine a little longer, my pillows are queen size.
The border will be 10 x 41 (contrasting color).
Lay the contrasting color (border) flat and right side up and lay the body of the pillow right side down on top of the border, roll the body up until you see the edge of the contrasting color, at this point you take the contrasting color and sandwich the body of the pillow case, pin  and sew, so that it looks like this:

 You will then start pulling out the body, like this:


Iron, border of pillow case, and add any embroidery you like or you can zig zag or not do anything at all if you like.  I like to add different embroidery to mine.


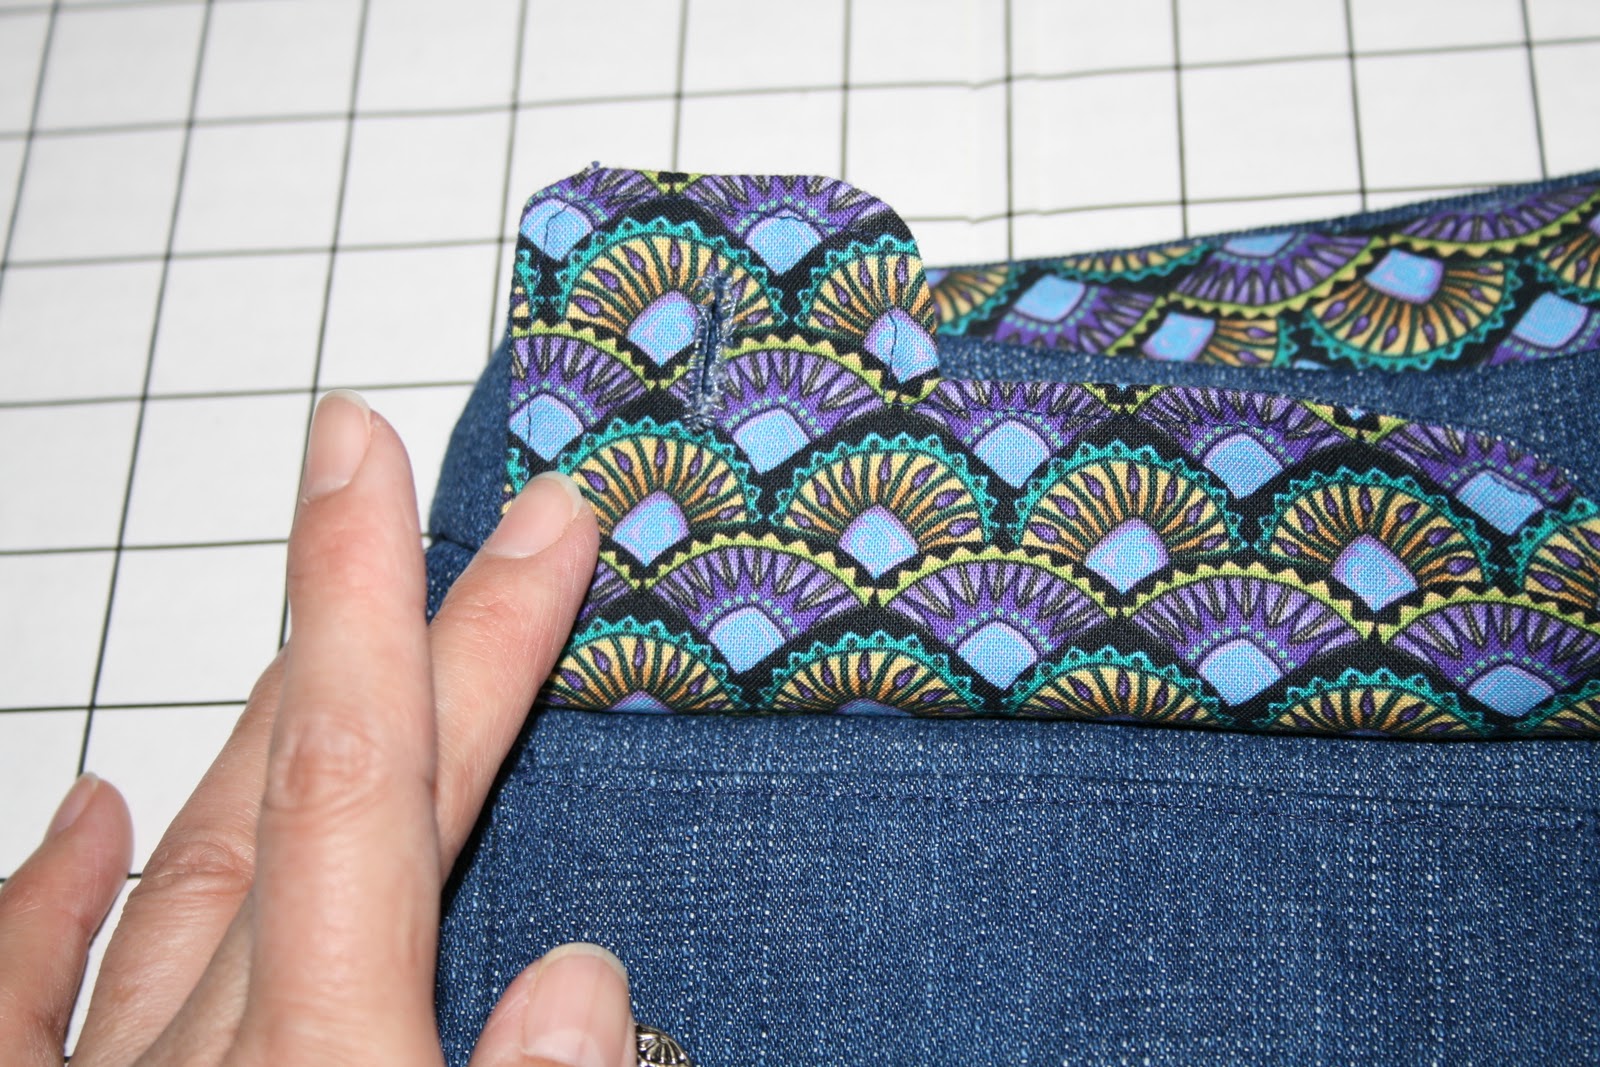
Now we're ready to sew up the side, you will be sewing this right side out, it should look like this when you're done:


Cut as close as possible to the seam without cutting into it:


Now you want to iron the seam flat and turn inside out and sew along the edge being careful to sandwich the raw edges, this is called a french seam, its just makes things neater.

Now you repeat the above steps to finish the bottom, when finished it will look like this:


You're done!

Just one more and you've got a set!